GOLFJOY support guide
Connect Your Launch Monitor to GSPro.
GSPro supports GOLFJOY launch monitors natively. Activate GSPro for GOLFJOY first. If GSPro does not find your launch monitor, set your computer's network with the Network Config Tool, which takes about 3 minutes, or enter the IP address yourself.
Step one
Activate GSPro for GOLFJOY.
GSPro is licensed separately by its publisher. Choose GOLFJOY as your launch monitor when you buy or convert the license.
New to GSPro: Choose GOLFJOY When You Buy
Buy a GSPro license and choose GOLFJOY from the launch monitor list.
Already Have GSPro: Convert Your License
Open the GSPro License Conversion Tool, enter your license key and choose GOLFJOY from the list.
Open the License Conversion Tool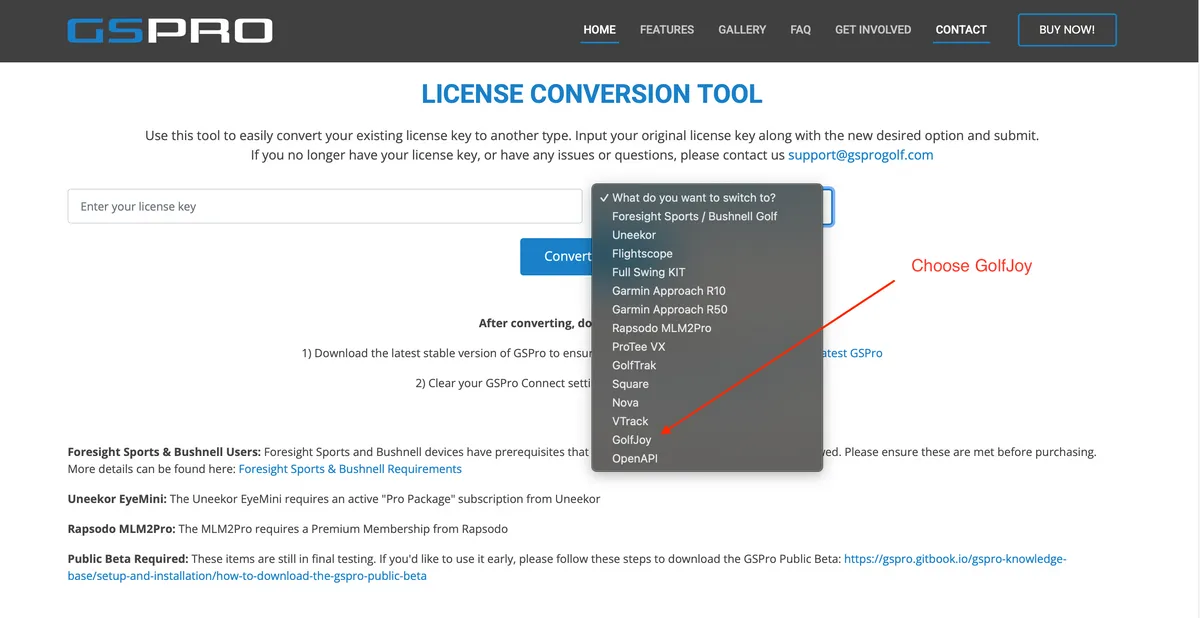
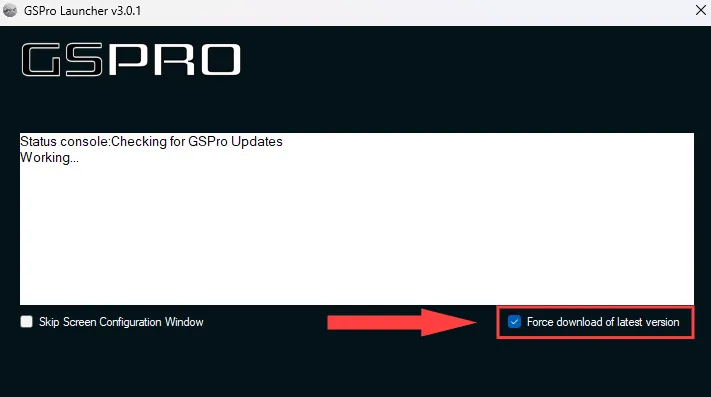
Download the Latest GSPro
After converting, start GSPro and check “Force download the latest version.”
Open API Users: Clear GSPro Connect Settings
If you connected through Open API before, clear the GSPro Connect settings as GSPro describes.
How to clear GSPro Connect settings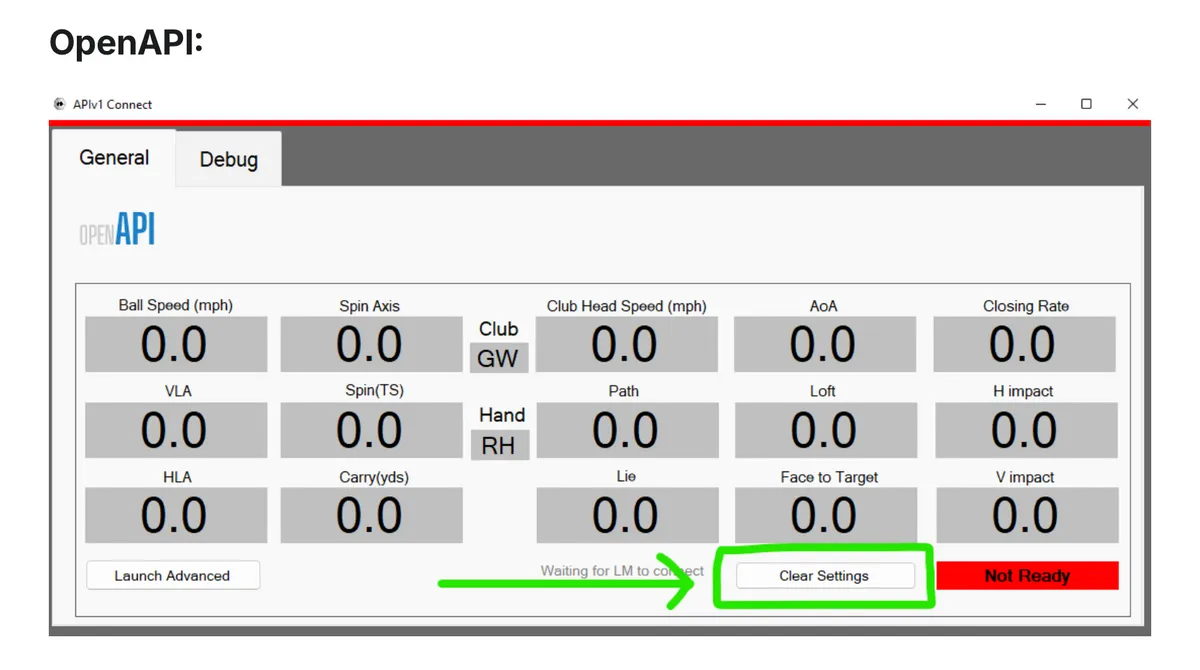
Recommended, about 3 minutes
Fix the Connection with the Network Config Tool.
The tool finds your launch monitor on the Ethernet cable and sets your computer's IP address for you.
Download the Network Config Tool
Download the GOLFJOY Network Config Tool and save it to your Windows PC.
Download the Network Config ToolConnect the Launch Monitor to Your PC
Use an Ethernet cable to connect the launch monitor directly to your computer's network port.
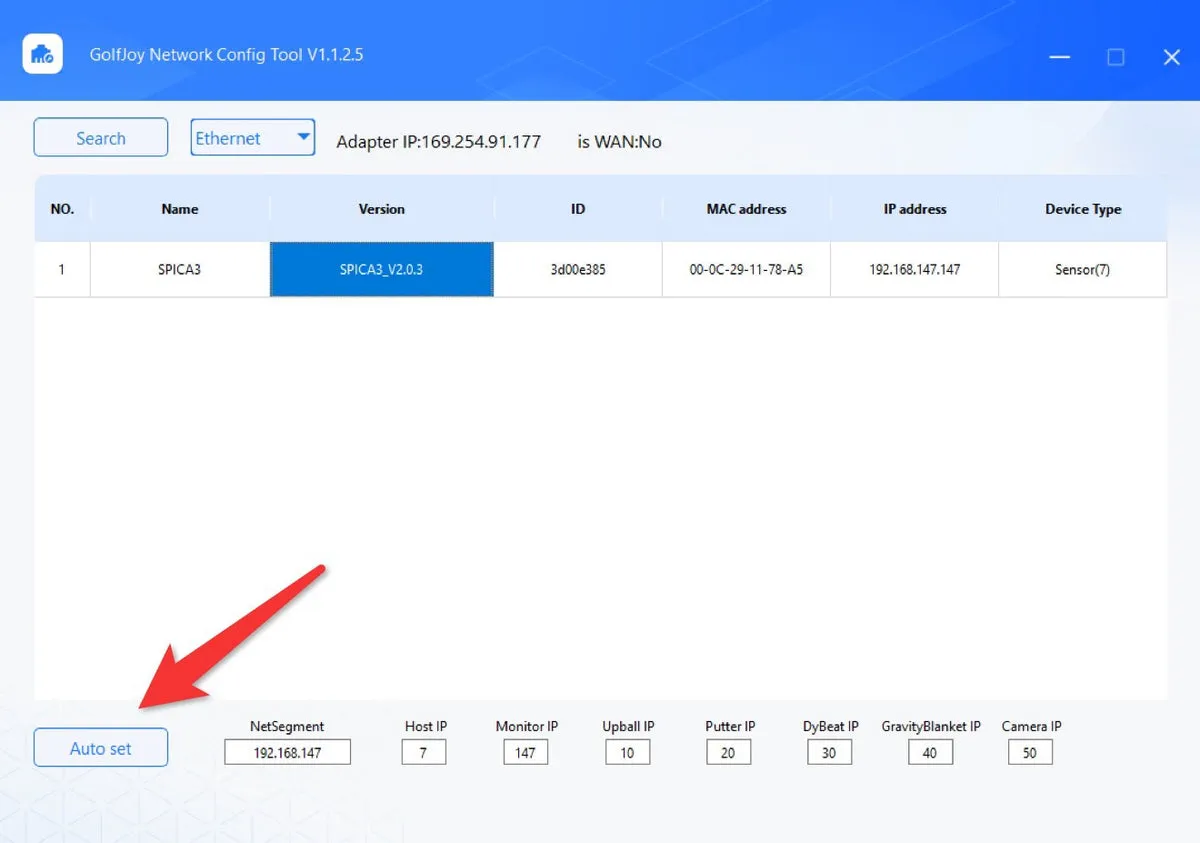
Run the Tool and Click Auto Set
Open the tool. Your launch monitor should appear in the device list. Click Auto set to set the correct IP address on your Ethernet port.
Confirm the Network Change
Click Yes to finish the setup.
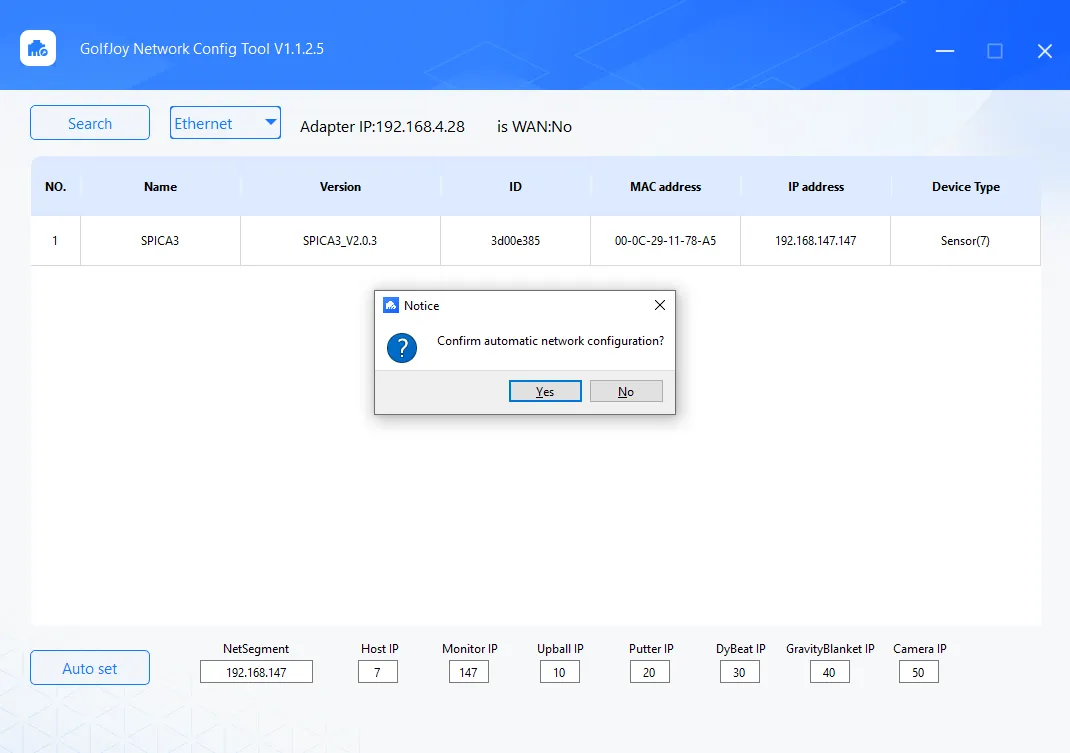
Open GSPro and Connect
Open GSPro. Your launch monitor appears and connects automatically.
If It Does Not Connect, Open GSPro Settings
Return to the GSPro main screen and click Settings in the upper-right corner.
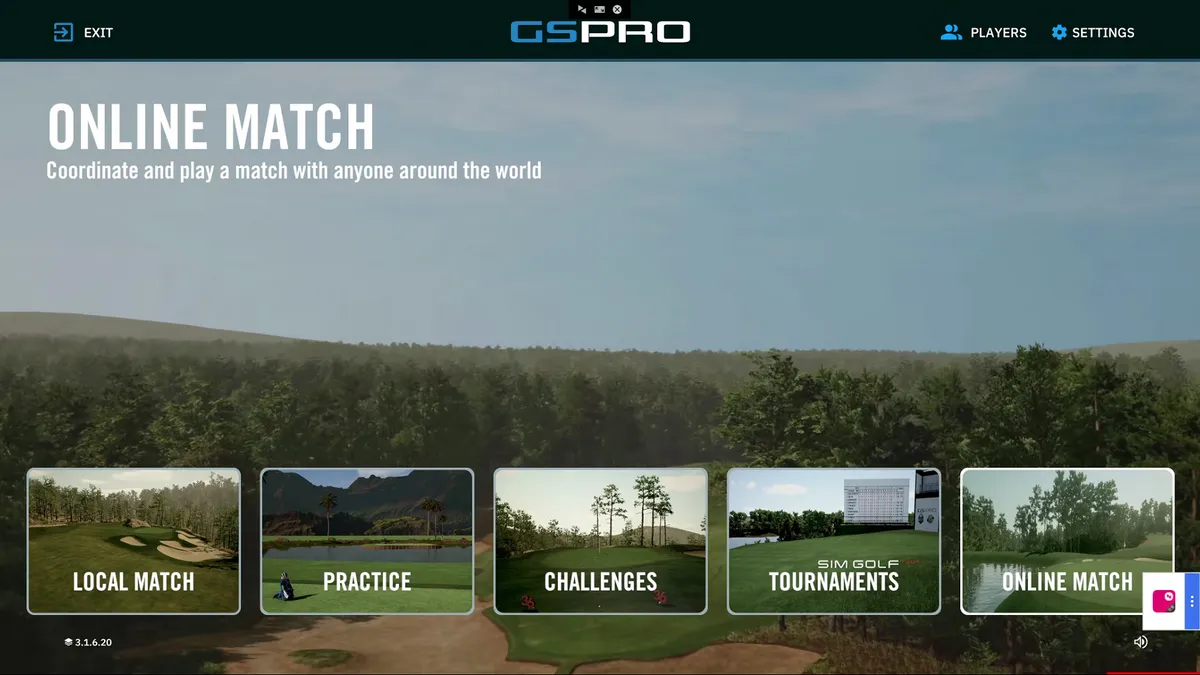
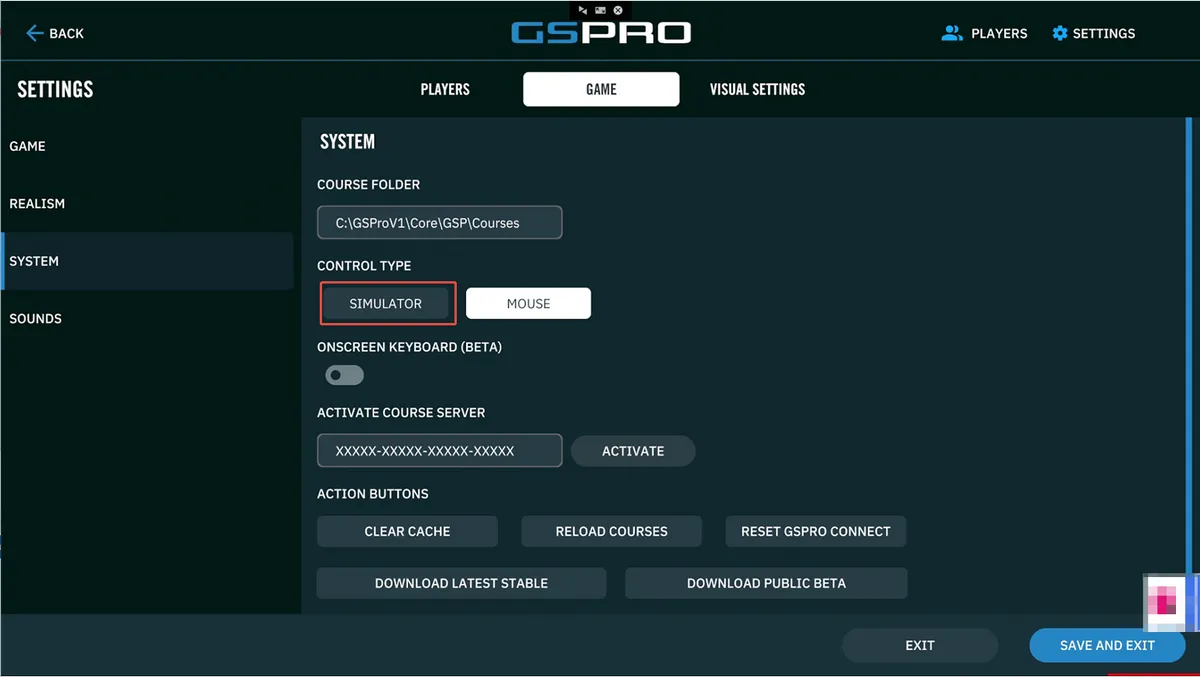
Set the Control Type to Simulator
Select Game, then System in the left menu. Under Control Type, select Simulator.
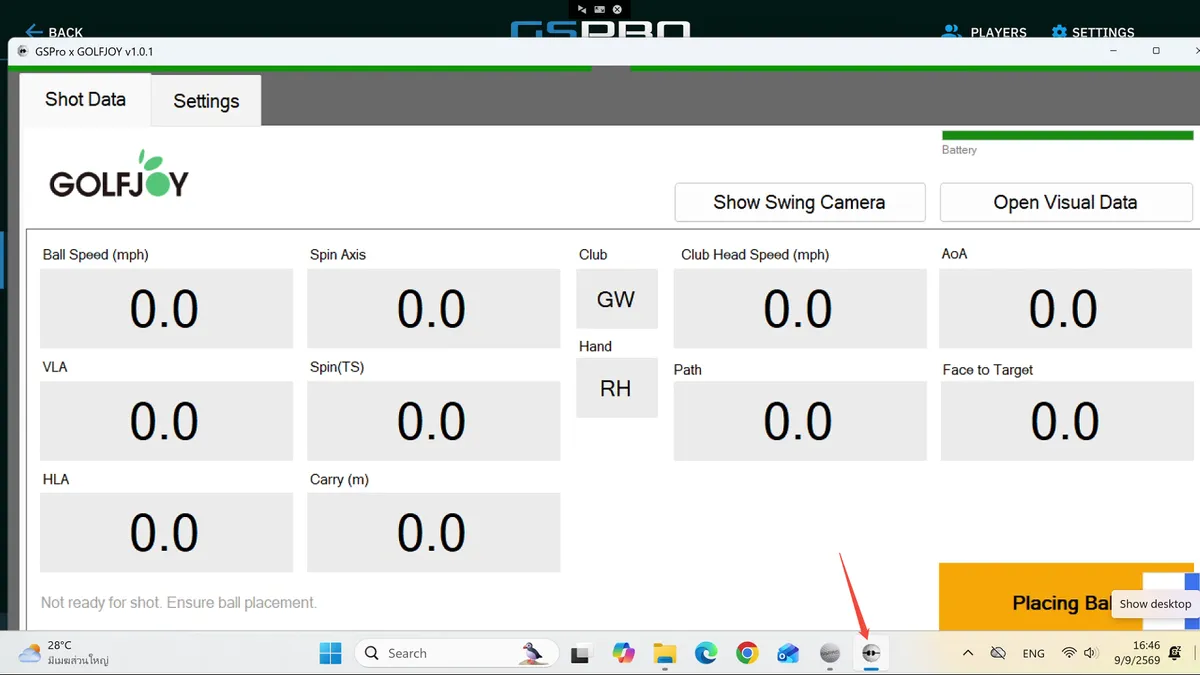
Keep the GOLFJOY Connector Running
Once connected, click Minimize (–) to keep the GOLFJOY Connector running in the background. Do not click Close (×), or the connection may stop.
Manual setup, about 5 minutes
Set the IP Address Yourself.
Use these Windows steps if you prefer not to run the tool.
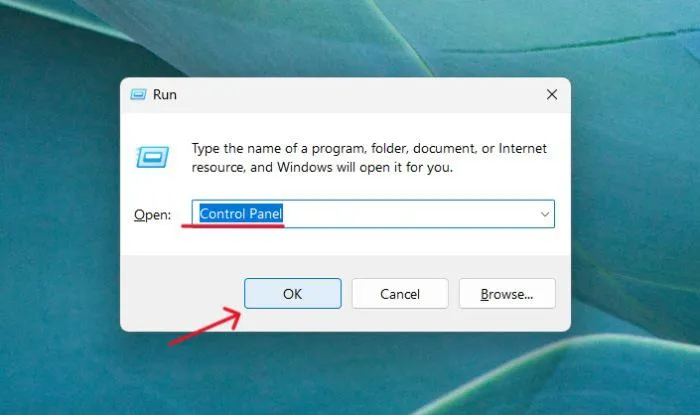
Open the Run Window
Turn on your computer and press Windows + R.
Open Control Panel
Type control panel and click OK.
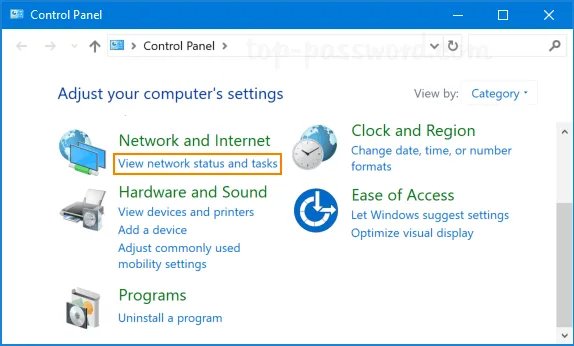
Open Network Settings
Under Network and Internet, click View network status and tasks.
Open Adapter Settings
On the left, click Change adapter settings.
Open Ethernet Properties
Right-click the unidentified network adapter, usually Ethernet, and select Properties.
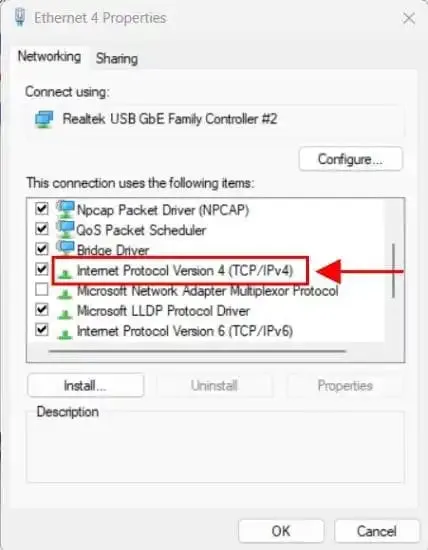
Open the IPv4 Settings
Double-click Internet Protocol Version 4 (TCP/IPv4).
Enter the IP Address
Select Use the following IP address and enter these values. Leave the gateway and DNS empty, then click OK. The launch monitor itself uses 192.168.147.147.
- IP address
- 192.168.147.7
- Subnet mask
- 255.255.255.0
Open GSPro
Open GSPro. Your launch monitor is ready to use.
Still Not Connecting?
Send the launch monitor model, serial number, GSPro version and the step where the connection stops.
Delivery, return, warranty and financing terms are confirmed before payment. Shipping · Returns · Warranty · Purchase Terms